Hii all!! I haven’t really been posting much of late have I?
Well, you are all in for a treat as I’m going to knock out some tutorials at long blooming last!
Where to begin?! I’ve been asked by some of the ladies on the hair extension forum to write up a basic set of tutorials on how to do the basic stitches for crochet: clicky to read
So, to make some bits clear. I am a lefty, and also am not trying to make any profit from writing tutorials. I’m just trying to make some of the stitches clearer for those who want to learn how to crochet 🙂 I am also writing this pattern in UK / AUS style as it’s easier for myself, but I am adding some bits for my American newbies out there. You can use this pattern on any weight yarn, on any sized hook – for reference, I am using a 3.5mm hook with DK weight yarn.
Shall we crack on then!
BEGIN HERE;
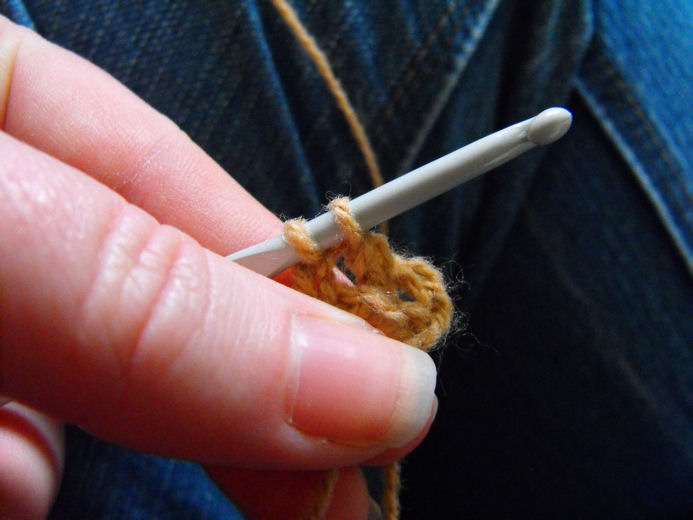
You’ll need to make a beginning ring to work your first round into.
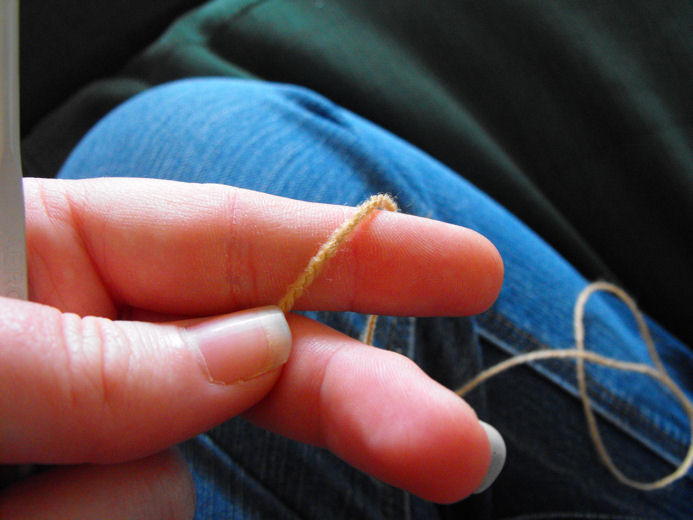
(Make a slipknot)
Lay the yarn over your index finger, wrap it round, pull the bit you wrapped round through the loop that you formed and pull until it has fully closed.


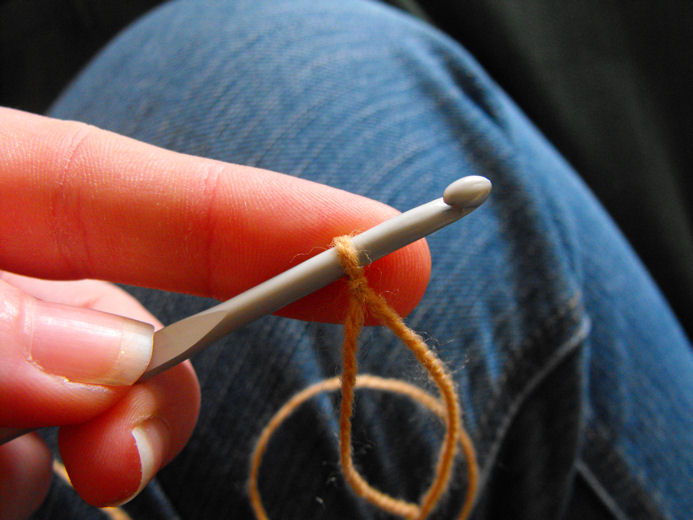
Place the slipknot onto the hook. Pull on the longer piece of yarn until the loop is nice and snug on the hook.
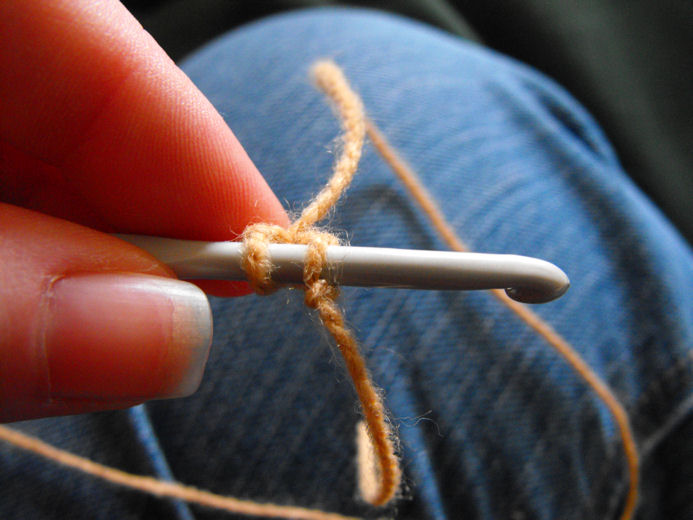
(Chain 4 stitches)
Move the yarn round the back of the hook, over the top and move the slipknot stitch over this stitch and off the hook.


You’ll need to do this 3 more times, so it looks like a little chain.

Next, you have to push the hook through the 1st little chain hole, and pull the yarn through so you have two stitches on the crochet hook. Move the first stitch (left stitch, if you’re a lefty) over the stitch and off the hook.


You should have something that resembles;
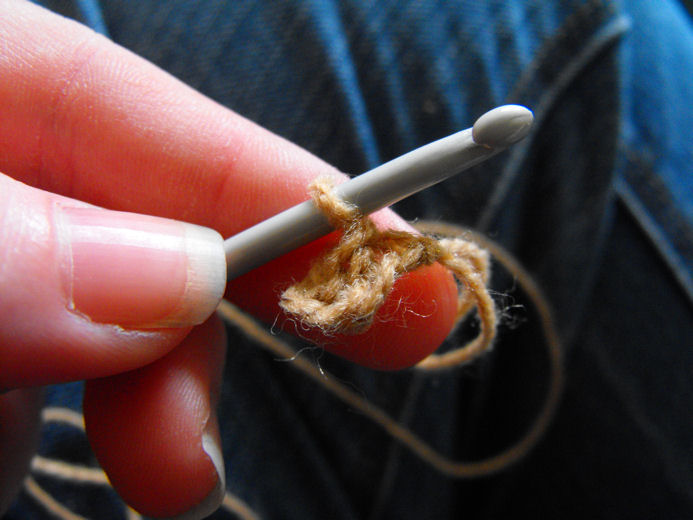
Woo!! We’ve made the starting chain and hole to work our granny square into.
(Work Round 1)
You’ll need to make 3 more little chains, which makes your first of 3 stitches.

Then, you’ll need to make something called a “Treble Stitch”. To do this you have to wrap the yarn round the hook, push the hook into the ring you made earlier, yarn over the hook again, pull this yarn back through, yarn over again. After this you should have four little bits of yarn on your hook. Next, you need to move the middle two stitches over the fourth, and off the hook. You’ll be left with two stitches. Yarn back over the hook again, and move the first two stitches over the third and off the hook.


You’ll need to follow these steps in making all the trebles in this pattern 🙂
Make another of the trebles. You’ll have three little chains coming from your loop!

Next, you have to make two chains. Same way as we made the first chain.

You’ll need to do another three of these 3 trebles & 2 chain sections.

Remember how we joined our first circle? We are going to do something similar now to join our little square, so it looks like a square.
You’ll need to push the hook through the little bit I’m showing with my thumb, pull the yarn back through, then move the first stitch over the second and off the hook.

Well done you! We’ve just done the first round!
(Work round 2)
If you turn your work round, you’ll see the little piece of yarn from the opening circle. This is the side we need to be working with. I’ve changed colour to show you the second round so there’s no confusion 🙂
Remember round 1 how we started with a chain for 3, two trebles, chain 2, 3 trebles? We’re going to do that again. You have your corner.
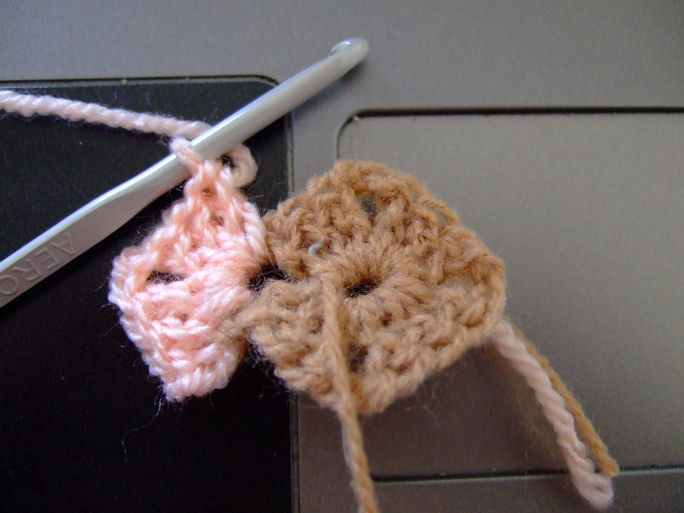
Now we need to to get over to the next gap. We need to chain 1, then 3 trebles, 2 chain, 3 trebles.

You’ll need to do this again twice so you’ve crochetted into the corners only. Then a final chain 1.

We need to do the closing stitch of the round that we’ve done twice already.

Well done on completing round 2!! Now you can either carry on by turning your work, you can snip the yarn and pull the loose end through the loop and pulling it nice and tight.
To give you an idea, this is what a 5 round granny square should look like!

This should be up on Ravelry about nowish, and I really hope this helps you all out on the basics of granny squares xx
